Complete the following tasks in the listed order:
o Set Promotion and Account Options
o Complete End of Year Changes
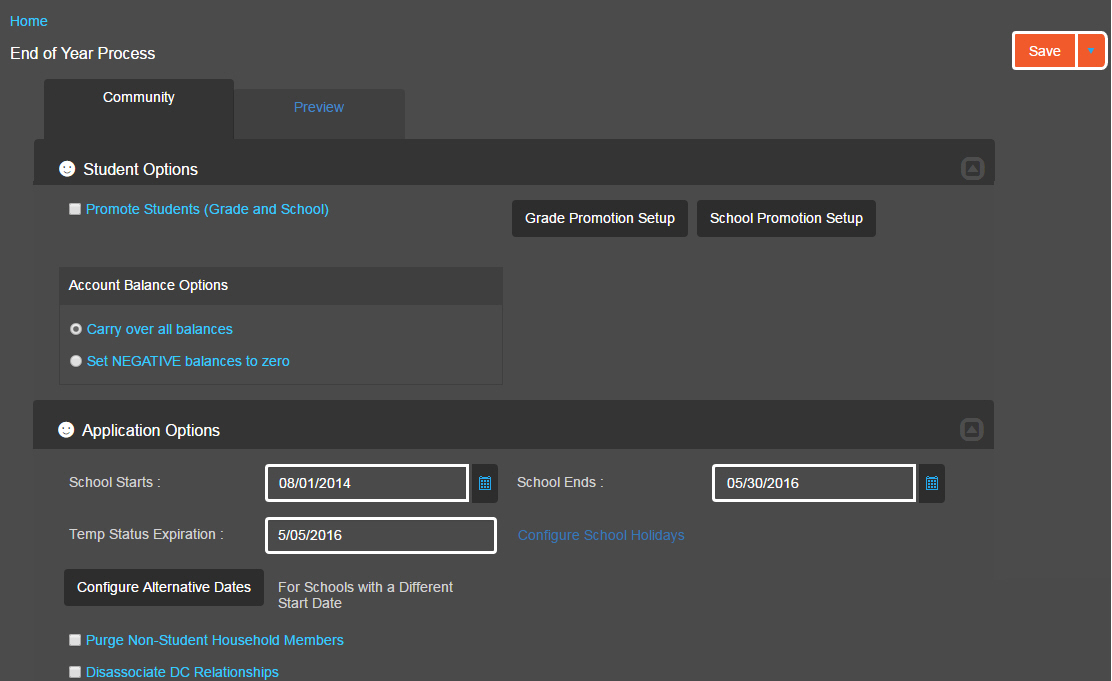
Use the End of Year page to set the options to complete the End of Year process.
1.Go to Admin > End of Year.
Go to next task.
Complete the following tasks in the listed order:
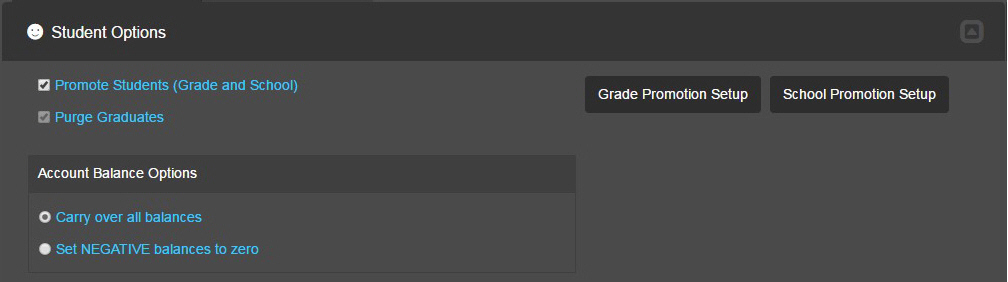
1.Select Promote Students (grade and School). Select this option to manually promote students to the next grade. Optionally, you can use the information in the SIS import to place the students in the correct grade. Inactive graduate students will be purged automatically.
2.To delete all graduating students, select Purge Graduates.
Optionally, instead of deleting graduates, you can promote 12th graders to grade “G” to maintain a record of any outstanding liabilities and financial holds.
3.To keep the existing balance information, select Carry over all balances.
4.To set all negative balances, select Set NEGATIVE balances to zero.
5.Click Save.
àGo to next task.
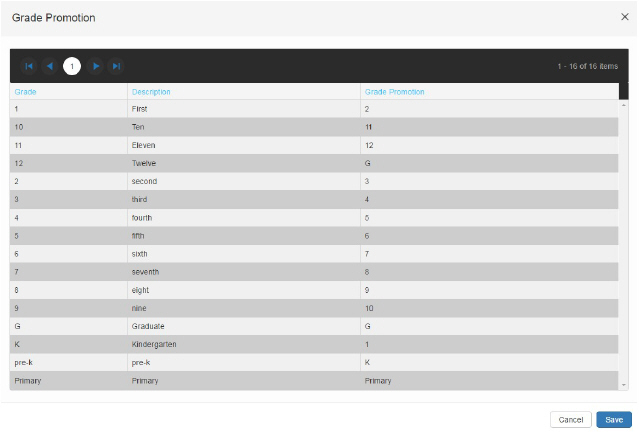
Task 2. Verify Grade Promotions
1.Click Grade Promotion Setup.
2.For each Grade, verify that the Grade Promotion is correct.
3.Make any necessary changes.
4.Click Save.
àGo to next task.
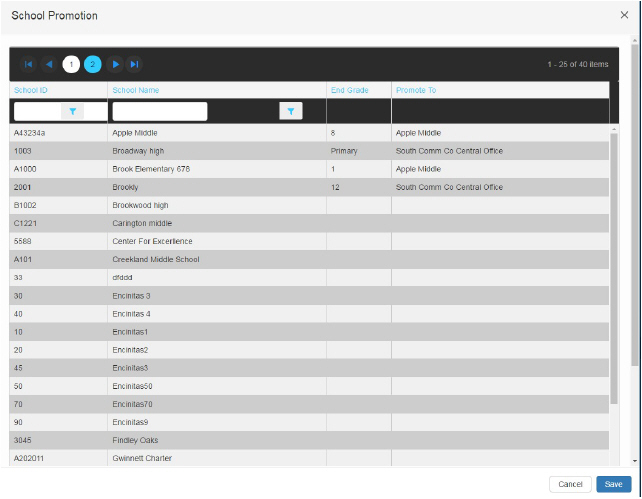
Task 3. Verify School Promotions
1.Click School Promotion Setup.
2.For each School ID, verify that the End Grade and Promote To school are correct.
3.Make any necessary changes.
4.Click Save.
àGo to next task.
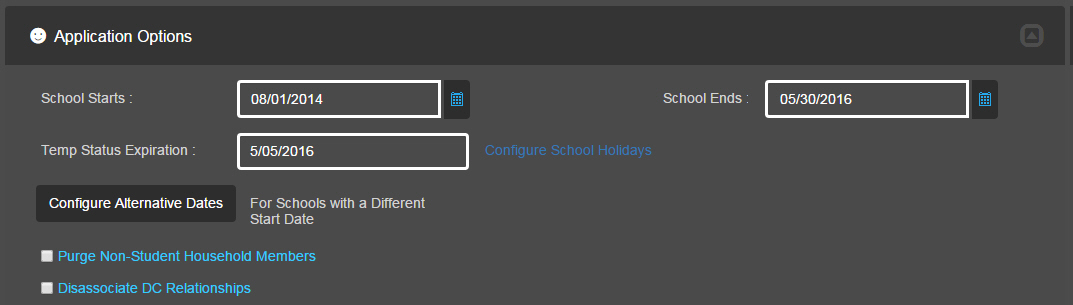
Under the Application Options, you will set the options that will be applied globally to the entire school district.
Here are some things you need to know about the Applications Options:
•The School Starts and School Ends dates will be applied to all schools in the district, unless the school is flagged as a Year-Round School. The Year-Round School flag is used to identify schools that have a different start date. To flag a school as Year-Round, go to Admin > Schools.
•The Temp Status Expiration is set automatically to 30 operational days from the School Starts date, as set on the district calendar.
•If the Purge Non-Student Household Members option is left unselected, Non-Student Household Members will remain on the applications, but the following information is reset:
Student case
All income
Direct certified
No SSN
Is Signer
Case number
Task 1. Set School Dates and Purge Non-Student Household Members
1.Enter the School Starts and School Ends dates.
2.Skip down to the last options:
Select Purge Non-Student Household Members if you want to delete all Non-Student Household Members on applications.
Select Disassociate DC Relationships to break all DC relationships when you run the End of Year process.
àGo to next task.
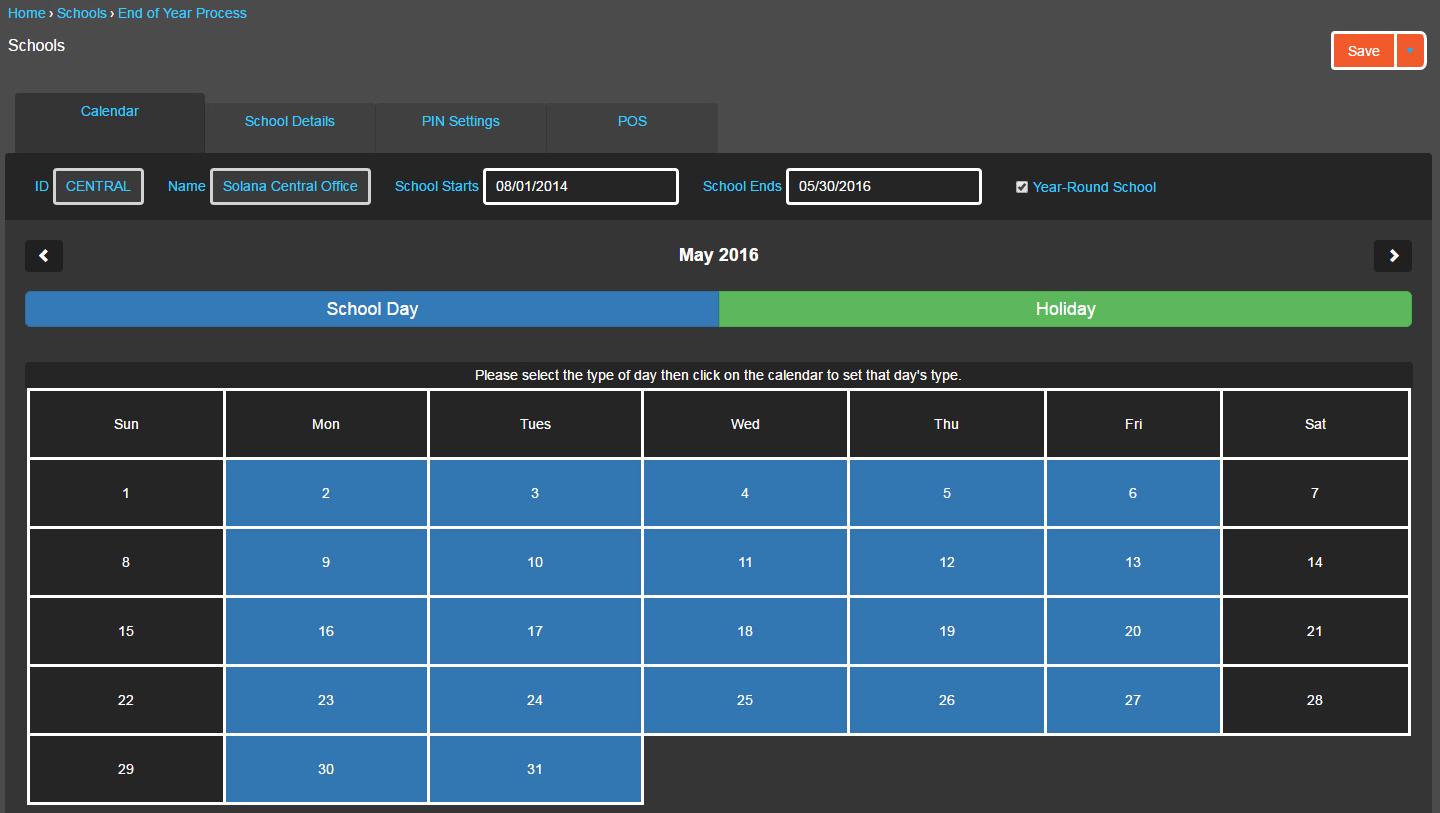
Task 2. Configure School Holidays
1.Click Configure School Holidays.
2.To set holidays, click Holiday and click the days that the school is closed for students.
3.Click Save.
4.To return to the previous page, click End of Year Process in the breadcrumb.
àGo to next task.
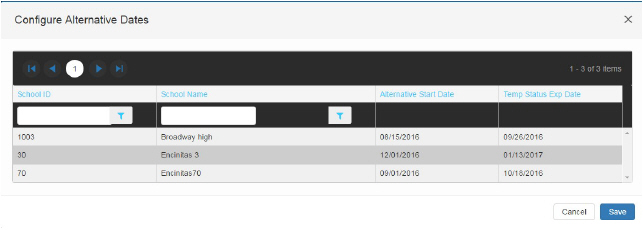
Task 3. Configure Alternative Dates
Use the Configure Alternative Dates window to set the dates for schools that follow a different schedule. Typically, this applies to schools that are in session year round.
2Only schools that are flagged as Year-Round School on the Schools page are listed in the Configure Alternative Dates window.
1.Click Configure Alternative Dates.
2.For the applicable schools, enter the Alternative Start Date.
3.Click Save.
Use the End of Year Preview tab review the proposed changes. Based on the information presented in the tab, you can determine if you need to go back to the Community tab and make changes to your options and setup.
1.Click the Preview tab.
2.Verify that the numbers look correct.
3.If you need to make any changes, click Community to make the necessary changes to your promotion setup.

àGo to next task.
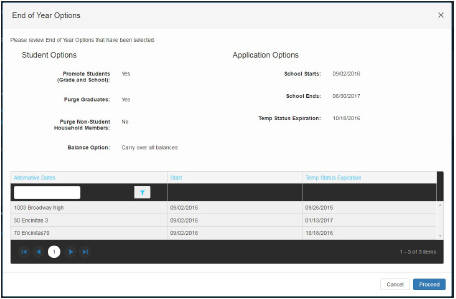
Once you agree with the numbers that are displayed on the Preview, you can to implement the End of Year changes.
1.On the multiaction button, select Complete End of Year from the dropdown list. The End of Year Options window displays to confirm the changes.
2.Click Proceed.
This completes the End of Year process. Next, complete the post End of Year tasks.
Every year during the rollover season, Horizon provides many services to help you to start the next school year smoothly. If you want to purchase school startup services, schedule them at the earliest time possible to receive the best price possible. The earlier you schedule the services, the better the price. Contact your sales representative (or e-mail us at rollovers@horizonsoftware.com) for more detailed information.