Refer to the following topics for more information:
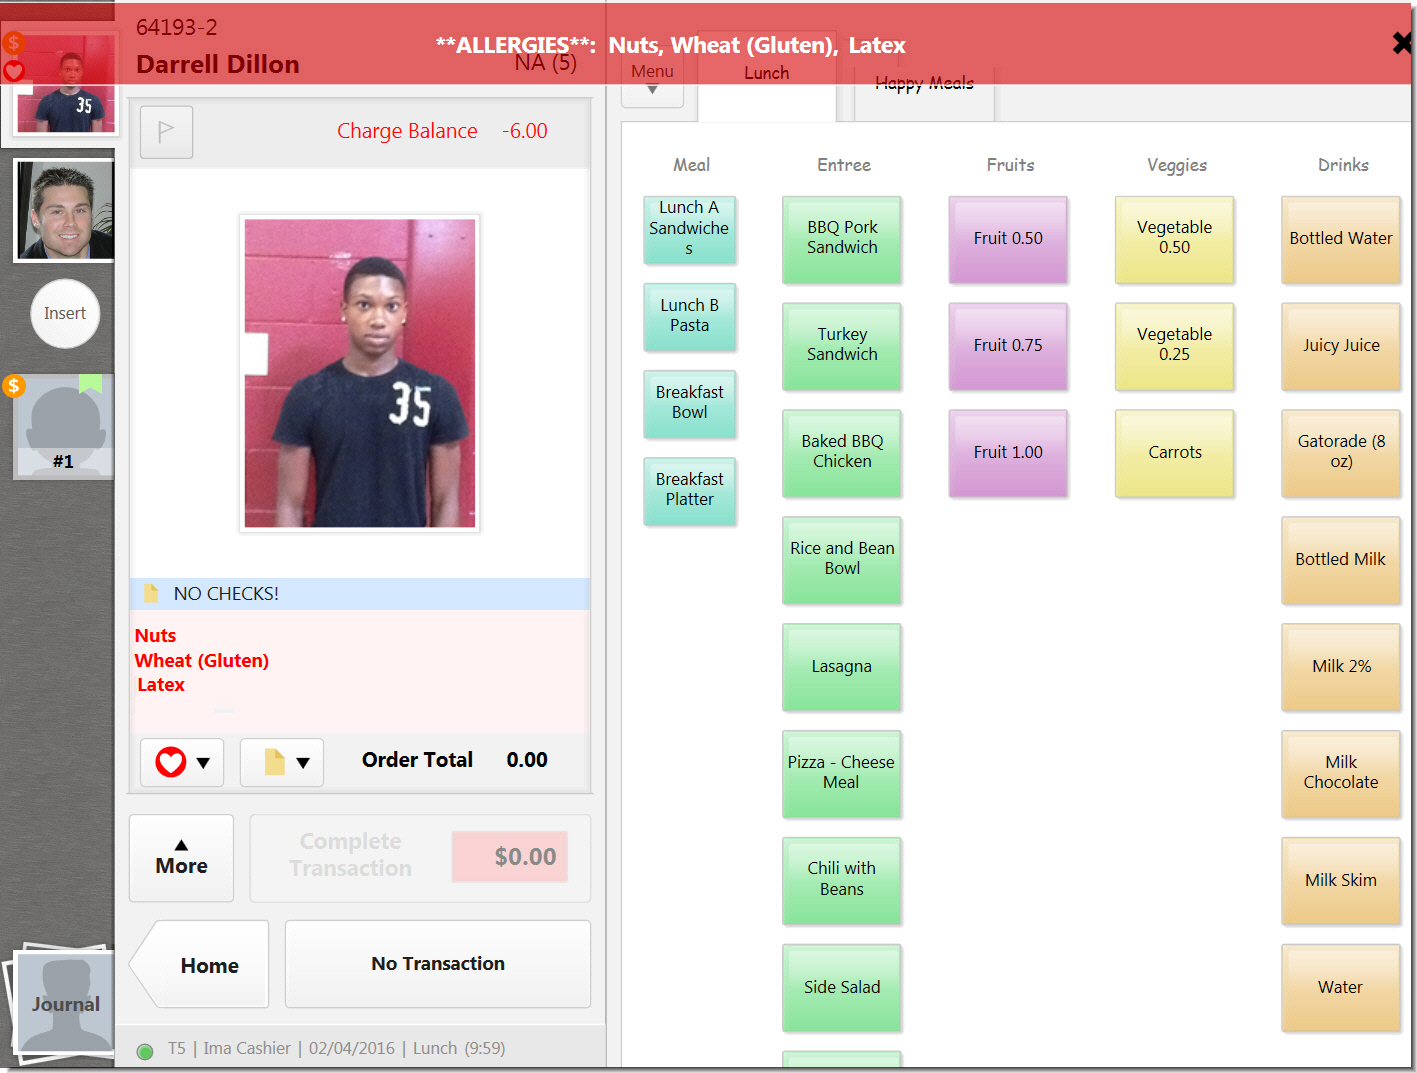
Categories determine how your POS items are grouped in the menus. When you create new POS items, the item is assigned to a category. On your menus, each category is represented by a column. To help cashiers quickly identify which column to select when entering items, a color is assigned to each category.
About Auto Sale
When you create a category, you can enable the Auto Sale option. Auto Sale is a sales mode that allows cashiers to automatically sell meals to students without entering in menu items. When the cashier enters the student’s PIN, the first item that is assigned to the category is automatically sold to the student.
The Auto Sale option must be enabled in order to use this feature. Go to Admin > Schools > POS.
Create a category
1.Go to POS > Items.
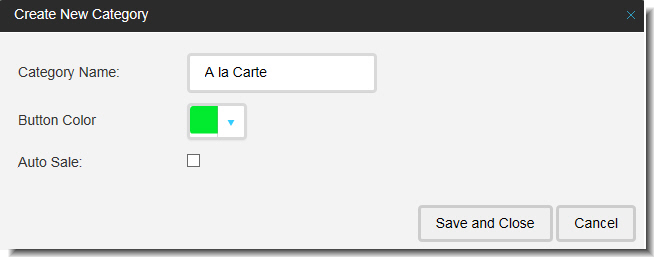
2.Select Create New Category from the orange Action box.
3.Enter the information.
4.Click Save and Close.
|
definition |
|
|---|---|
|
Category Name |
Enter a category name for inventory item. |
|
Button Color |
Select the color you want to use for items assigned to this category. This is how it will display on the menu in POS. |
|
Auto Sale |
Select this option to enable Auto Sale for this item. |
1.Go to POS > Items.
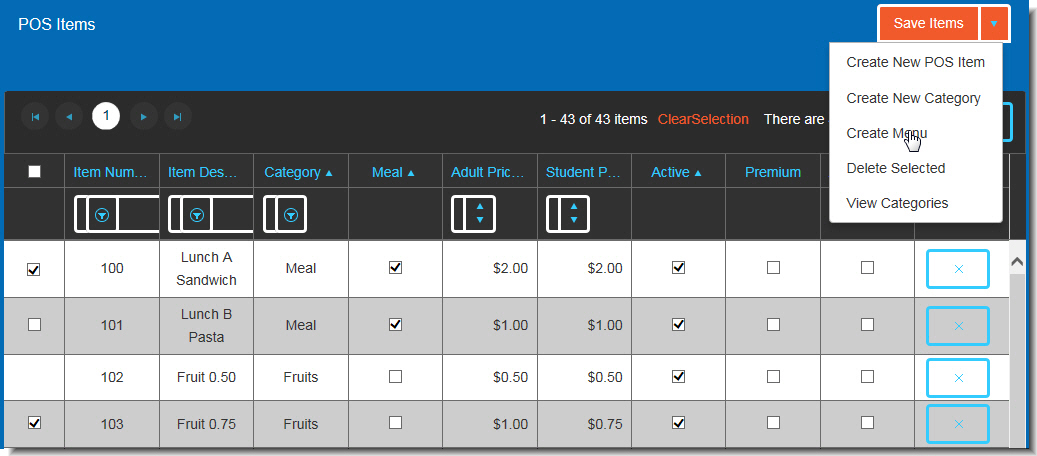
2.Select Create New POS Item. The Create New POS window is displayed.
3.Enter the number of items that you would like to add. You can add up to 10 records.
4.Click Add Items.
5.Enter the information for the item(s).
6.Click Save Items. Save frequently while you are adding new POS items.
Refresh (F5) the page before adding more items.
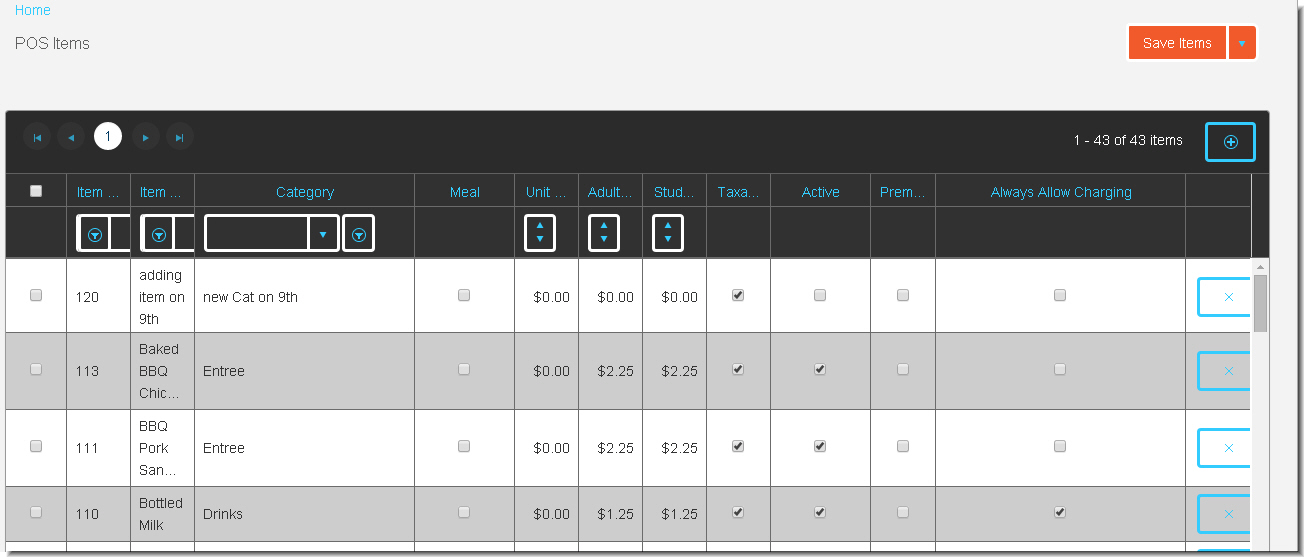
1.Go to POS > Items.
2.Click the field that you want to modify.
3.Enter your change.
4.Click Save Items.
2You can only delete an item if it is not assigned to a menu.
1.Go to POS > Items.
2.Click the Delete for the item that you want to remove.
3.Click OK to confirm that you want to delete the item.
|
definition |
|
|---|---|
|
Item Number |
A stock number is automatically assigned to the item. Optionally, you can enter an item number. |
|
Item Description |
Enter a description of the item. This description is displayed on menus. |
|
Category |
Assign the item to a category. |
|
Meal |
Indicate if the item is considered as a meal at the point of service. |
|
Unit Price |
Enter the cost of the item. |
|
Adult Price |
Displays the default price that will be charged to adults for the item at the point of service. |
|
Student Price |
Displays the default price that will be charged to students for the item at the point of service. |
|
Taxable |
Indicate if a tax applies to the item. By default, this option is automatically selected when you add a new POS item. |
|
Active |
Indicates if the item can be assigned to a menu. |
|
Premium |
Select this option to override the Reimbursable Meal Pricing and use the Adult Price and Student Price that is set for the item. |
|
Always Allow Charging |
Select this option to allow customers to charge the item to be to the meal account. This is primarily used for milk. |
You can create a menu using one of the following methods:
•Select Items to Create a Menu
•Create a Menu and Add Items
1.Go to POS > Items.
2.Select the checkbox for the items that you want to include in the menu.
3.Select Create Menu.
4.Enter the Menu Name.
5.Select a Serving Period to assign to the menu.
9.Click Save.
1.Go to POS > Menus.
2.Click Create Menu.
3.Enter the Menu Name.
4.Select a Serving Period to assign to the menu.
8.Click Save.
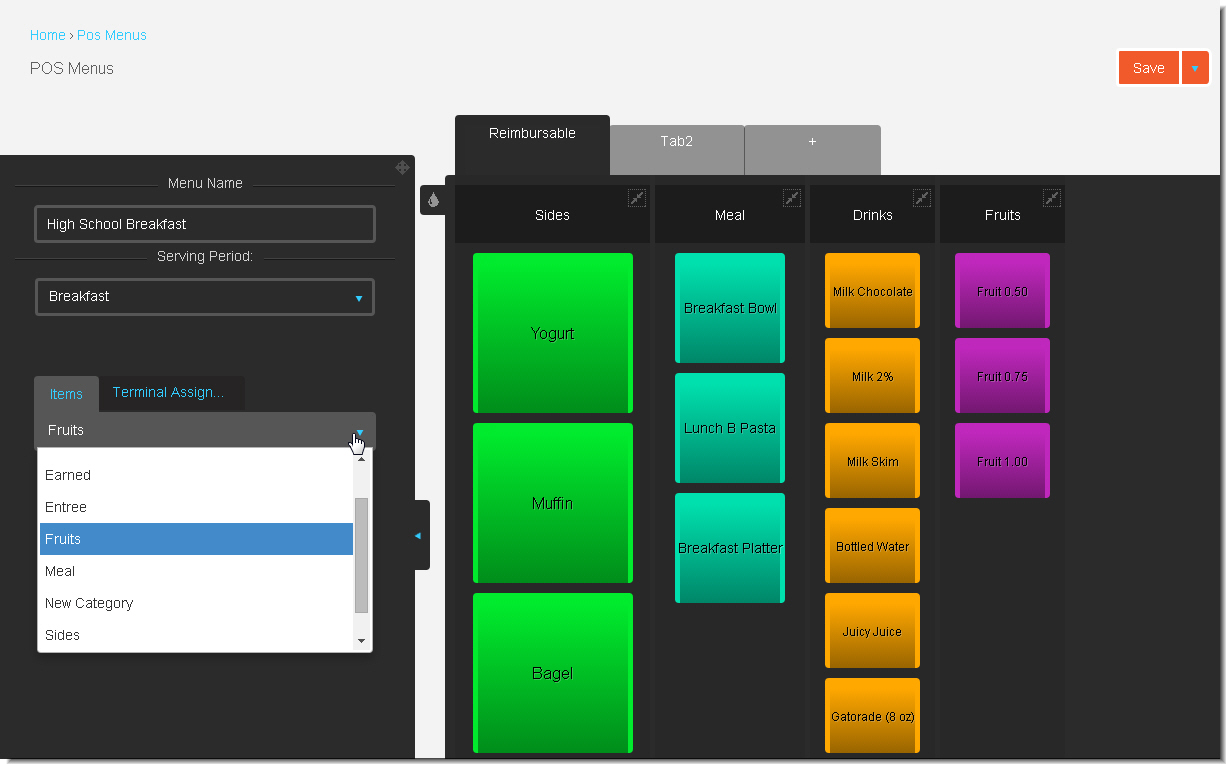
1.Double click an item to add it to the menu.
2.To filter the items based on a category, click the Items dropdown.
3.Click the + on the last tab.
4.Optionally, you can create a separate tab for each serving period or to support additional categories. To add a tab, click the + sign on the last tab.
5.To reorder items in a group, drag and drop a menu item to where you want it placed.
6.Click Save.
1.Click the Terminal Assignment tab.
2.Select the Site Type.
3.Select the terminals that you want to assign the menus to.
4.To assign the item to terminals for specific schools, expand the terminal, and select the schools.
5.Click Save.
1.Double click the menu tab text to rename the menu. The text that you enter is displayed on the menu in POS.
2.Click the Waterdrop ( )to toggle on/off the button colors.
3.Click the Resizer ( ) to resize the buttons. Select S (Small), M (Medium), or L (Large).
4.To reorder items in a group, drag and drop a menu item to where you want it placed.
5.To reorder the categories, drag and drop a category to where you want it placed.
6.Click Save.
1.Double click the item on the menu tab.
2.Click Save.